

To set up a barcode inventory system, work in this order: design a consistent SKU scheme, decide which items use their existing manufacturer barcodes and which need your own labels, load clean product data into your inventory software, print and test labels, configure your scanners, label your storage locations, and finish with a full opening stock count so the system starts from the truth. Most small businesses can complete this in one to three weeks, depending on how many products they carry. If you have not chosen the software yet, read our buyer’s guide to inventory software with barcode scanning first.
The order matters. Labels printed before the SKU scheme is settled get reprinted. Scanners set up before product data is clean produce “item not found” errors that make staff give up on scanning. And an opening count done before shelves are labeled takes twice as long.
What you need before you start
- Inventory software that can store SKUs and barcodes per product and variant, accept scans in receiving, counting and sales, and print or export barcode labels.
- A product list exported from wherever it lives today: spreadsheet, old POS or online store.
- A label printer and labels sized for your products and shelves.
- At least one barcode scanner per workstation where stock is received, counted or sold.
- A quiet day or weekend for the opening count.
Step 1: Create SKUs with a consistent scheme
A SKU (stock keeping unit) is your own internal code for each distinct item you stock. Every variant that you count separately, such as each size and color of a shirt, needs its own SKU. A barcode is just a machine-readable way of writing a number; the SKU is what your team sees and talks about.
Rules for a SKU scheme that lasts:
- Keep it short: 8–12 characters is plenty.
- Use only capital letters, digits and hyphens. Avoid letters that look like digits (O and 0, I and 1).
- Put the most general part first: category, then product, then variant.
- Never reuse a SKU for a different product, even after the old one is discontinued.
- Do not encode things that change, such as price, supplier or location.
Example scheme (illustrative):
| Product | Category code | Product number | Variant | SKU |
|---|---|---|---|---|
| Cotton T-shirt, black, medium | TS | 0042 | BLK-M | TS-0042-BLK-M |
| Cotton T-shirt, black, large | TS | 0042 | BLK-L | TS-0042-BLK-L |
| Ceramic mug, 350 ml | KT | 0107 | 350 | KT-0107-350 |
| USB-C cable, 1 m | EL | 0213 | 1M | EL-0213-1M |
Step 2: Decide which barcode each item will carry
You do not have to label everything yourself. Sort your products into three groups:
- Items that already carry a manufacturer barcode (a UPC or EAN on the packaging). Scan that barcode into the product record and you are done; no label needed.
- Your own products sold through other retailers or large online marketplaces. These generally need official GTINs (Global Trade Item Numbers) licensed from GS1, the standards body that manages retail barcode numbers. GS1 explains the process on its get barcodes page.
- Items sold only in your own shop or used internally (loose items, kits, refurbished stock, spare parts). Print your own labels encoding the SKU, usually as Code 128.
Avoid buying cheap “barcode numbers” from resellers if you plan to sell through major retailers; many require GTINs licensed directly to your company.
Which barcode symbology should you use?
A symbology is the visual format of the barcode. The four you will meet most often:
| Symbology | What it encodes | Typical use | Scanner needed |
|---|---|---|---|
| UPC-A | 12 digits (a GTIN-12) | Retail products, mainly in North America | Any 1D or 2D scanner |
| EAN-13 | 13 digits (a GTIN-13) | Retail products in most of the world | Any 1D or 2D scanner |
| Code 128 | Letters, digits and symbols, variable length | Internal SKU labels, shelf and bin labels, shipping; GS1-128 is the GS1 version for logistics data | Any 1D or 2D scanner |
| QR code | Up to thousands of characters, including web addresses | Links to product pages, manuals or batch information; growing use on packaging | 2D imager or phone camera |
GS1 US publishes a helpful overview of barcode types and where each is used. Retail is also gradually moving toward 2D barcodes that can carry more data, such as batch and expiry; GS1’s guideline for 2D barcodes at retail point of sale describes that transition. Practically, this means a 2D imager scanner is the safer purchase today, because it reads both 1D and 2D codes.
For your own internal labels, Code 128 is the default choice: it is compact, handles your alphanumeric SKUs directly, and every scanner reads it.
Step 3: Clean and import your product data
Before importing, clean the spreadsheet:
- One row per SKU, including every variant
- Columns for SKU, name, barcode (manufacturer UPC or EAN where present), category, unit of measure, cost, price and supplier
- No duplicate SKUs or duplicate barcodes; sort by each column and check
- Barcode values stored as text so leading zeros are not lost (spreadsheets often turn 012345678905 into 12345678905)
Import a small batch of 20 products first, check them in the software, then import the rest.
Step 4: Print barcode labels that actually scan
Choose a printer type
- Direct thermal printers need no ribbon and are cheap to run. Labels fade with heat and sunlight over months, which is fine for shelf-life stock and shipping labels.
- Thermal transfer printers use a ribbon and produce durable labels for items stored for a long time, kept in warm places or handled heavily.
- Office laser printers with sheet labels work for a one-off labeling project but are slow for daily use.
Design the label
- Barcode encoding the SKU (or the GTIN for retail items)
- The SKU in human-readable text below it, so staff can type it if a label is damaged
- A short product name and variant
- Price only if you are sure it will not change soon; otherwise use shelf-edge labels for price
Test before printing hundreds
Print ten labels and scan each one with every scanner model you own, at different angles and distances. Leave a clear margin (the “quiet zone”) on both sides of a 1D barcode and do not scale it so small that the bars blur. Stick test labels on the real packaging: curved bottles and shiny wraps cause more failed scans than anything else.
Step 5: Set up your barcode scanners
Most USB and Bluetooth scanners work in HID keyboard mode: the scanner “types” the barcode into whatever field has focus, then presses Enter. Web-based inventory software with a scan field works with them without drivers.
- Choose the type: a 2D imager reads 1D and 2D barcodes and codes on phone screens; a 1D laser scanner reads only linear barcodes. Choose cordless models for receiving and stocktakes.
- Set the suffix: configure the scanner to send Enter (carriage return) after each scan, using the programming barcodes in its manual. Without it, staff must press Enter after every scan.
- Check the keyboard layout: if the scanner and computer use different keyboard layouts, characters such as hyphens can come through wrong. Scan a SKU into a plain text editor to confirm it arrives exactly as printed.
- Disable symbologies you do not use to reduce misreads, but keep UPC, EAN, Code 128 and QR enabled.
- Test in the software: scan ten known products in the sales, receiving and counting screens.
Step 6: Label your storage locations
If you have more than a few shelves, give each location a code and a barcode label, such as A-03-2 for aisle A, bay 3, shelf 2. Scanning the location and then the item during counts and put-away tells the system exactly where stock lives. If you operate more than one site, see our guide to multi-warehouse inventory management for a location naming scheme that scales.
Step 7: Run the opening stock count
The opening count sets the starting quantities. A sloppy one undermines everything after it.
- Freeze movement: pick a time when nothing is received or shipped, or log any movement on paper to enter afterwards.
- Organize: group identical items together and put loose items in labeled bins.
- Assign zones: give each pair of people a set of locations.
- Scan-count: scan the location label, then scan every item (or scan once and enter the quantity for cases of identical items).
- Recount discrepancies: a second person recounts any location where the result differs from what you expected by more than a small threshold.
- Post the count: load the final quantities into the system as your opening balance, with cost values for accounting.
Example (illustrative): a shop with 1,200 SKUs across 40 shelves and four counting pairs, each scanning about 150 items per hour, can usually finish in one long day, including recounts.
Step 8: Make scanning the default for every movement
A barcode system stays accurate only if every movement is scanned:
- Receiving: scan items against the purchase order, not just the delivery note.
- Selling: scan at the POS so stock decreases with each sale. Our guide to POS and inventory in one system explains why this link matters.
- Transfers, returns and write-offs: scan them too, with a reason code.
- Cycle counts: count a small section each week instead of relying on one big annual count.
Self-hosted options on AppTrovo
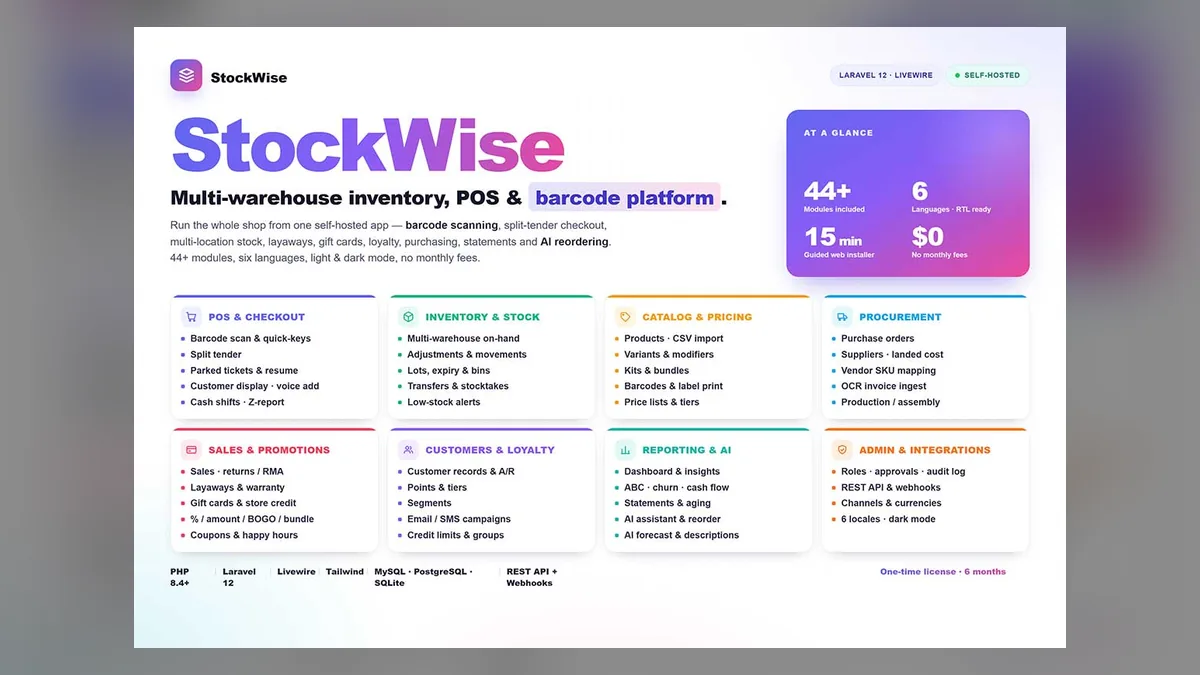
StockWise - Multi-warehouse inventory with barcode scanning is built for this workflow. It supports hardware barcode scanners in HID mode, barcode label printing, per-location stock with bin locations, lot and serial tracking with expiry dates, purchase orders with receiving, and stocktakes that snapshot quantities, count, then post the variance. Its point of sale accepts scans as well, so sales reduce stock directly.

It runs on your own server with MySQL, PostgreSQL or SQLite, includes a guided web installer and lets you export data to CSV at any time. Like everything on AppTrovo, it is a one-time license with full source code. See the complete tour of StockWise or browse the inventory category.
Frequently asked questions
Do I need to buy barcodes from GS1?
Only for products you sell through other retailers or marketplaces that require GTINs. For items you sell only in your own store or use internally, you can print your own Code 128 labels encoding your SKU.
What is the difference between a SKU and a barcode?
A SKU is your internal code for a distinct item. A barcode is a machine-readable symbol that can encode a SKU, a manufacturer’s GTIN or other data. One product can have both: a manufacturer UPC on the box and your SKU in the system.
Which barcode scanner should a small business buy?
A 2D imager in HID keyboard mode is the most flexible choice. It reads UPC, EAN, Code 128 and QR codes, including codes on phone screens, and works with web-based software without drivers. Add cordless models for receiving and counting.
Can I use my phone as a barcode scanner?
Many inventory apps support camera scanning, which is fine for occasional counts and small stores. For daily receiving or busy checkouts, a dedicated scanner is much faster and more reliable.
How long does it take to set up barcode inventory?
For a small business with a few hundred to a few thousand SKUs, one to three weeks is typical: a few days for the SKU scheme and data cleanup, a few for labeling, and one day for the opening count.